How to Install a Backup Camera DIY: A Comprehensive Guide
Reversing into a parking spot or navigating tight spaces can be a nerve-wracking experience, especially in today’s crowded urban environments. Fortunately, technology has provided a solution to this problem: the backup camera. These cameras offer a clear view of what’s behind your vehicle, significantly reducing the risk of accidents and making parking a breeze.
While professional installation is always an option, installing a backup camera yourself can save you money and give you a sense of accomplishment. This comprehensive guide will walk you through the process step-by-step, ensuring a smooth and successful DIY installation.
Why Install a Backup Camera?
Before diving into the installation process, let’s understand why a backup camera is a valuable addition to your vehicle:
- Enhanced Safety: Backup cameras eliminate blind spots, allowing you to see pedestrians, children, pets, or objects that might be hidden from view.
- Accident Prevention: By providing a clear view of what’s behind you, backup cameras significantly reduce the risk of collisions while reversing.
- Easier Parking: Maneuvering into tight parking spaces becomes much easier with a backup camera, as you can accurately judge distances and avoid bumping into other vehicles or objects.
- Increased Awareness: Backup cameras provide a wider field of vision than rearview mirrors, giving you a better understanding of your surroundings.
- Peace of Mind: Knowing that you have a clear view of what’s behind you can significantly reduce stress and anxiety while reversing.
Tools and Materials You’ll Need
Before you begin the installation process, gather the necessary tools and materials:
- Backup Camera Kit: Choose a kit that includes the camera, monitor, wiring harness, and any necessary mounting hardware. Consider factors like camera resolution, viewing angle, and monitor size when selecting a kit.
- Wire Strippers: Used to strip the insulation from wires to make connections.
- Wire Crimpers: Used to crimp connectors onto wires for secure connections.
- Electrical Tape: Used to insulate and protect wire connections.
- Multimeter: Used to test electrical circuits and ensure proper voltage.
- Drill: Used to drill holes for mounting the camera and running wires.
- Screwdrivers: Used to remove and install screws.
- Socket Set: Used to remove and install nuts and bolts.
- Pliers: Used to grip and manipulate wires and connectors.
- Fish Tape or Wire Hanger: Used to pull wires through tight spaces.
- Zip Ties: Used to secure wires and keep them organized.
- Safety Glasses: To protect your eyes from debris.
- Gloves: To protect your hands.
- Vehicle-Specific Wiring Diagram: This will help you identify the correct wires to connect to. You can usually find this information in your vehicle’s service manual or online.
Step-by-Step Installation Guide
Now that you have all the necessary tools and materials, let’s begin the installation process:
1. Preparation:
- Read the Instructions: Carefully read the instructions that came with your backup camera kit. This will provide specific guidance for your particular model.
- Disconnect the Battery: Disconnect the negative terminal of your vehicle’s battery to prevent electrical shorts.
- Plan the Camera Placement: Determine where you want to mount the camera. Common locations include the license plate area, the rear bumper, or the trunk lid.
- Plan the Monitor Placement: Decide where you want to mount the monitor. Common locations include the dashboard, the rearview mirror, or the center console.
2. Installing the Camera:
- Remove the License Plate (if necessary): If you’re mounting the camera in the license plate area, remove the license plate and any surrounding trim.
- Drill a Hole (if necessary): If the camera requires a hole for mounting or wiring, drill a hole in the designated location. Be careful not to drill into any wires or components behind the panel.
- Mount the Camera: Secure the camera to the mounting location using the provided hardware.
- Run the Camera Wire: Route the camera wire through the vehicle’s body to the interior. This may involve removing interior panels or using a fish tape to pull the wire through tight spaces.
3. Installing the Monitor:
- Mount the Monitor: Secure the monitor to the mounting location using the provided hardware.
- Run the Monitor Wire: Route the monitor wire to the vehicle’s electrical system. This may involve removing interior panels or using a fish tape to pull the wire through tight spaces.
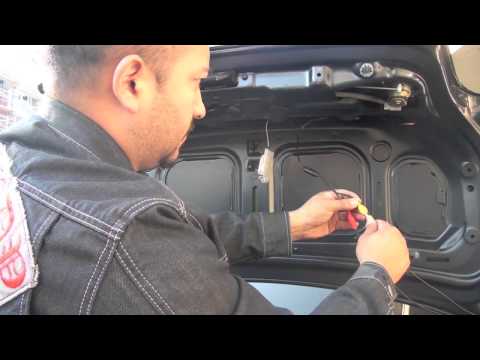
4. Connecting the Wiring:
- Locate the Reverse Light Wire: Use a multimeter to identify the wire that powers the reverse lights. This wire will typically be located in the taillight assembly or near the fuse box.
- Connect the Camera Power Wire: Connect the camera’s power wire to the reverse light wire. This will ensure that the camera only turns on when the vehicle is in reverse.
- Connect the Camera Ground Wire: Connect the camera’s ground wire to a metal part of the vehicle’s frame. This will provide a good ground connection.
- Connect the Monitor Power Wire: Connect the monitor’s power wire to a 12V power source in the vehicle. This could be the accessory power wire or a dedicated power wire.
- Connect the Monitor Ground Wire: Connect the monitor’s ground wire to a metal part of the vehicle’s frame.
- Connect the Video Signal Wire: Connect the camera’s video signal wire to the monitor’s video input.
5. Testing and Final Assembly:
- Reconnect the Battery: Reconnect the negative terminal of your vehicle’s battery.
- Test the Camera: Put the vehicle in reverse and check if the camera is working properly. The monitor should display a clear image of what’s behind the vehicle.
- Secure the Wires: Use zip ties to secure all the wires and keep them organized.
- Reinstall Interior Panels: Reinstall any interior panels that were removed during the installation process.
- Adjust the Camera Angle: Adjust the camera angle to provide the best possible view.
Tips for a Successful Installation:
- Take Your Time: Don’t rush the installation process. Take your time and follow the instructions carefully.
- Use the Right Tools: Using the right tools will make the installation process much easier and more efficient.
- Double-Check Connections: Make sure all wire connections are secure and properly insulated.
- Test Before Reassembling: Test the camera and monitor before reassembling the interior panels.
- Consult a Professional: If you’re not comfortable with any part of the installation process, consult a professional.
Troubleshooting Common Issues:
- No Image on Monitor: Check the power and ground connections to the camera and monitor. Also, check the video signal wire connection.
- Poor Image Quality: Check the camera lens for dirt or smudges. Also, make sure the camera is properly focused.
- Camera Not Turning On: Check the power connection to the reverse light wire. Also, make sure the vehicle is in reverse.
- Monitor Not Turning On: Check the power and ground connections to the monitor.
Conclusion:
Installing a backup camera yourself can be a rewarding experience that saves you money and enhances the safety of your vehicle. By following this comprehensive guide, you can successfully install a backup camera and enjoy the benefits of improved visibility and easier parking. Remember to take your time, use the right tools, and consult a professional if you’re not comfortable with any part of the process. With a little patience and effort, you can significantly improve your driving experience and enhance the safety of yourself and others on the road.
