Okay, here’s a comprehensive guide on detailing a black car without introducing swirl marks, aiming for around 1200 words. This guide focuses on proper techniques and product selection to achieve a flawless, swirl-free finish.
The Ultimate Guide to Detailing a Black Car Without Swirl Marks
Black cars are undeniably stunning when clean and well-maintained. However, they are notorious for showing every imperfection, especially swirl marks. These fine, circular scratches are a black car owner’s worst nightmare, dulling the paint and diminishing its deep, reflective shine. Detailing a black car requires meticulous attention to detail and the use of proper techniques to avoid creating or exacerbating swirl marks. This guide provides a step-by-step approach to achieving a swirl-free, showroom-worthy finish on your black beauty.
Understanding Swirl Marks and Why They Occur
Swirl marks are caused by improper washing, drying, and polishing techniques. They are essentially microscopic scratches in the clear coat, the protective layer over your car’s paint. The most common culprits include:
- Abrasive Wash Mitts and Sponges: Using dirty or low-quality wash mitts that trap dirt and debris can scratch the paint as you wash.
- Improper Washing Technique: Applying excessive pressure or using circular motions can grind dirt into the paint, creating swirl marks.
- Drying with Dirty Towels: Drying your car with a dirty or abrasive towel can also scratch the paint.
- Aggressive Polishing: Using too much pressure, an abrasive polish, or a dirty polishing pad can introduce swirl marks.
- Automatic Car Washes: These are notorious for using harsh brushes and recycled water that can damage the paint.
Preparation is Key: Gathering Your Supplies
Before you begin, gather all the necessary supplies. Investing in quality products and tools is crucial for achieving a swirl-free finish.
- Two Buckets with Grit Guards: Essential for the two-bucket wash method.
- pH-Neutral Car Wash Soap: Choose a high-quality soap specifically designed for cars.
- Microfiber Wash Mitts (Multiple): Opt for soft, plush microfiber mitts. Use separate mitts for the upper and lower sections of the car.
- Wheel Cleaning Supplies: Wheel cleaner, wheel brushes, and a dedicated wash mitt.
- Bug and Tar Remover: For removing stubborn contaminants.
- Clay Bar and Lubricant: For removing embedded contaminants.
- Microfiber Drying Towels: Large, plush microfiber towels for drying.
- Paint Thickness Gauge (Optional): Helpful for assessing the clear coat thickness before polishing.
- Detailing Clay: This is used to remove embedded contaminants that washing alone cannot remove.
- Polishing Machine (Dual-Action Recommended): A dual-action polisher is safer for beginners and less likely to cause holograms.
- Polishing Pads (Various Grades): Use different pads for cutting, polishing, and finishing.
- Compound and Polish: Choose products appropriate for the severity of the swirl marks. Start with the least aggressive option.
- Isopropyl Alcohol (IPA): For wiping down the paint after polishing to inspect for imperfections.
- Paint Protection (Wax, Sealant, or Ceramic Coating): To protect the paint and enhance its shine.
- Microfiber Applicator Pads: For applying wax or sealant.
- Microfiber Buffing Towels: For removing wax or sealant.
- Good Lighting: Essential for inspecting the paint for imperfections.
- Masking Tape: For protecting trim and delicate areas.
The Step-by-Step Detailing Process
-
Pre-Wash Rinse: Rinse the entire car thoroughly with water to remove loose dirt and debris. Use a pressure washer if available, but be careful not to get too close to the paint.
-
Wheel Cleaning: Clean the wheels and tires first to prevent contamination of the freshly washed paint. Use a dedicated wheel cleaner and brushes to remove brake dust and grime. Rinse thoroughly.
-
Bug and Tar Removal: Apply a bug and tar remover to affected areas, allowing it to dwell for the recommended time before gently wiping away the residue.
-
The Two-Bucket Wash Method: This is crucial for preventing swirl marks.
- Bucket 1 (Wash Bucket): Fill with clean water and car wash soap.
- Bucket 2 (Rinse Bucket): Fill with clean water only.
- Dip your wash mitt into the wash bucket, thoroughly cleaning a section of the car.
- Rinse the mitt in the rinse bucket to remove any dirt and debris.
- Wring out the mitt and repeat the process.
- Work in sections, washing from top to bottom.
- Use a separate wash mitt for the lower sections of the car, as they tend to be dirtier.
-
Rinse Thoroughly: Rinse the entire car thoroughly with clean water to remove all traces of soap.
-
Clay Bar Treatment: Clay barring removes embedded contaminants that washing alone cannot remove.
- Knead the clay bar into a flat, pliable shape.
- Spray the area with clay bar lubricant.
- Gently glide the clay bar over the lubricated surface, using light pressure.
- Fold the clay bar frequently to expose a clean surface.
- If the clay bar becomes heavily contaminated, discard it and use a fresh piece.
- Wipe away any lubricant residue with a clean microfiber towel.
-
Drying: Use large, plush microfiber drying towels to dry the car.
- Gently pat the surface dry, avoiding circular motions.
- Use a separate towel for the wheels and tires.
- Consider using a leaf blower or air compressor to blow water out of crevices.
-
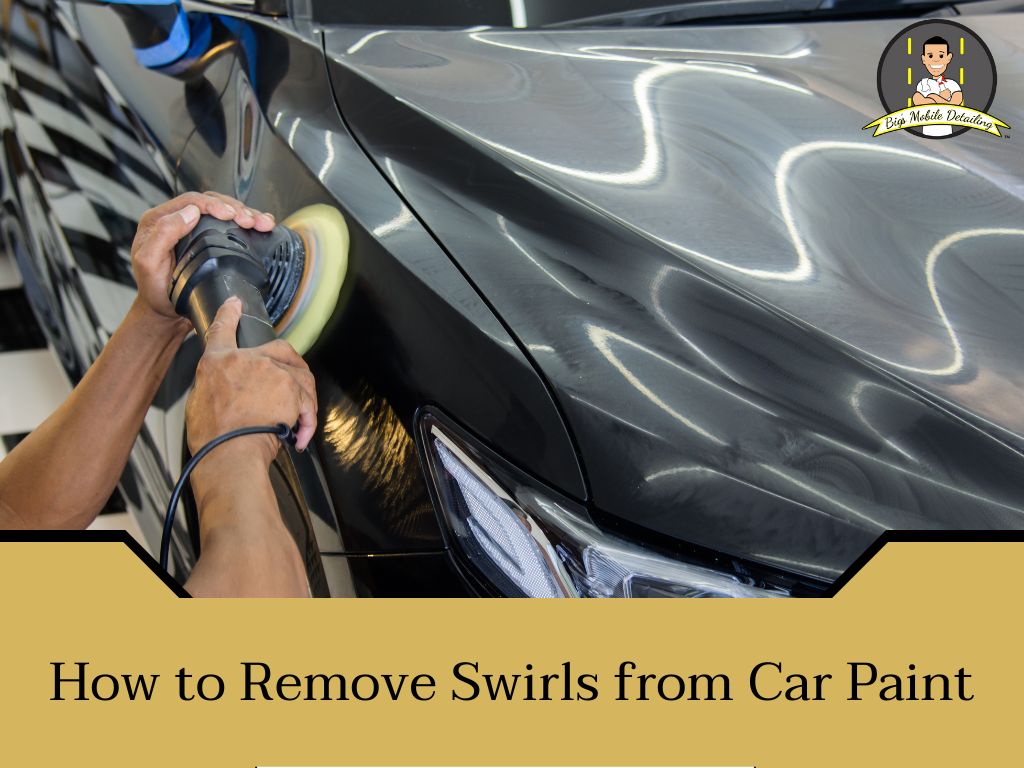
Paint Correction (Polishing): This is where you remove swirl marks and other paint imperfections.
- Inspect the Paint: Use good lighting to identify swirl marks, scratches, and other imperfections.
- Tape Off Delicate Areas: Use masking tape to protect trim, rubber seals, and other delicate areas.
- Choose the Right Polish and Pad: Start with the least aggressive combination of polish and pad. For light swirl marks, a finishing polish and a soft polishing pad may be sufficient. For heavier swirl marks, you may need to use a compound and a more aggressive cutting pad.
- Apply Polish to the Pad: Apply a small amount of polish to the polishing pad.
- Prime the Pad: Dab the pad onto the paint in several spots to distribute the polish.
- Polish the Paint: Turn on the polishing machine and use overlapping passes to polish the paint. Apply moderate pressure and work in small sections.
- Wipe Away Polish Residue: Use a clean microfiber towel to wipe away the polish residue.
- Inspect the Paint: Use IPA to wipe down the paint and inspect for imperfections. Repeat the polishing process if necessary.
-
Paint Protection: Apply a layer of wax, sealant, or ceramic coating to protect the paint and enhance its shine.
- Wax: Provides a warm, glossy shine but requires frequent application.
- Sealant: Offers longer-lasting protection than wax but may not provide the same level of gloss.
- Ceramic Coating: Provides the most durable protection and enhances gloss but requires professional installation.
- Apply the product according to the manufacturer’s instructions.
- Use a microfiber applicator pad to apply the product evenly.
- Allow the product to cure for the recommended time.
- Buff away the residue with a clean microfiber towel.
-
Final Touches: Clean the windows, dress the tires, and apply any other finishing touches.
Tips for Maintaining a Swirl-Free Finish
- Wash Your Car Regularly: Wash your car at least every two weeks to prevent dirt and debris from accumulating.
- Use the Two-Bucket Wash Method: Always use the two-bucket wash method to minimize the risk of swirl marks.
- Use High-Quality Wash Mitts and Towels: Invest in soft, plush microfiber mitts and towels.
- Dry Your Car Immediately: Don’t let water spots dry on the paint.
- Avoid Automatic Car Washes: These can damage the paint and introduce swirl marks.
- Protect Your Paint: Apply a layer of wax, sealant, or ceramic coating to protect the paint from the elements.
Detailing a black car without swirl marks is a labor of love, but the results are well worth the effort. By following these steps and using the right products and techniques, you can achieve a flawless, showroom-worthy finish that will turn heads wherever you go. Remember to always prioritize proper preparation, gentle techniques, and high-quality products to minimize the risk of introducing swirl marks. Good luck, and enjoy your beautifully detailed black car!
