How to Install Car Speakers Yourself: A Comprehensive Guide
Upgrading your car’s audio system is one of the most satisfying DIY projects you can undertake. A simple speaker replacement can dramatically improve sound quality, transforming your daily commute or road trips into a more enjoyable experience. While professional installation is an option, installing car speakers yourself is entirely achievable with the right tools, a bit of patience, and this detailed guide.
Before You Begin: Assessment and Preparation
-
Identify Your Needs: What are you hoping to achieve? Are you seeking louder volume, clearer sound, or deeper bass? Knowing your goals will help you choose the right speakers.
-
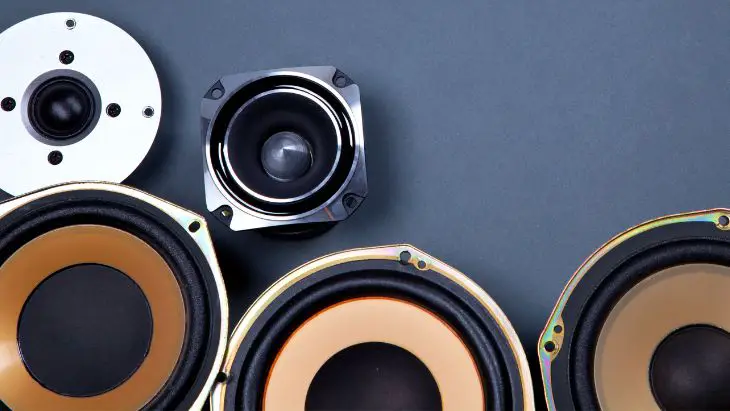
Speaker Size and Type: Determine the correct speaker size for your vehicle’s make, model, and year. Online resources like Crutchfield or vehicle-specific forums are invaluable. Consider component speakers (separate tweeters and woofers) for superior sound quality or coaxial speakers (tweeter and woofer combined) for simplicity.
-
Gather Your Tools and Materials: Having everything on hand before you start will streamline the process. Here’s a list of essentials:
- New Car Speakers
- Screwdrivers (Phillips and flathead)
- Panel Removal Tools (plastic pry bars)
- Wire Strippers/Crimpers
- Wire Connectors (crimp connectors, butt connectors, or soldering iron and solder)
- Electrical Tape
- Speaker Wire (if needed)
- Wire Harness Adapters (highly recommended)
- Drill (if necessary for new mounting holes)
- Measuring Tape
- Pencil or Marker
- Gloves (to protect your hands)
- Safety Glasses
-
Safety First: Disconnect the negative terminal of your car battery before starting any electrical work. This prevents accidental shorts and potential damage to your vehicle’s electrical system.
-
Read the Manuals: Consult your vehicle’s owner’s manual and the instructions included with your new speakers. These provide valuable information about speaker locations, wiring diagrams, and any specific considerations for your vehicle.
-
Plan Your Work: Take a few minutes to visualize the process. Knowing the steps involved will make the installation smoother and less prone to errors.
Step-by-Step Installation Guide
-
Removing the Old Speakers
- Door Panels: Most car speakers are located in the doors. Use panel removal tools to gently pry the door panel away from the door frame. Start at the bottom corners and work your way around the edges. Be careful not to force the panel, as this can damage the clips that hold it in place.
- Screws and Fasteners: Once the panel is loose, look for any screws or fasteners that may be securing it. Remove these before attempting to fully detach the panel.
- Disconnect Wiring: Carefully disconnect any wiring harnesses attached to the door panel, such as those for power windows, door locks, and speakers.
- Speaker Removal: With the door panel removed, you’ll have access to the speaker. Unscrew the speaker from its mounting bracket.
- Disconnect Speaker Wires: Disconnect the speaker wires from the old speaker. Take note of the polarity (positive and negative) of the wires. Usually, the positive wire is marked with a stripe or is a different color.
- Repeat: Repeat this process for each speaker you plan to replace.
-
Preparing the New Speakers
- Speaker Wire Harness Adapters: These are a must-have! They allow you to connect your new speakers to the existing wiring without cutting or splicing any wires. Simply plug the adapter into the factory wiring harness and then connect the other end to your new speaker.
- Mounting Brackets: If your new speakers are a different size or shape than the old ones, you may need to install mounting brackets. These brackets provide a secure and proper fit for the new speakers.
- Test Fit: Before fully installing the new speakers, do a test fit to ensure they fit properly in the mounting location.
-
Connecting the New Speakers
- Wire Connections: If you’re not using speaker wire harness adapters (though highly recommended to use them), you’ll need to connect the speaker wires directly to the new speakers. Use wire strippers to remove a small amount of insulation from the ends of the wires.
- Crimping/Soldering: Use wire connectors (crimp connectors, butt connectors, or soldering iron and solder) to connect the wires. Ensure a secure and reliable connection. If soldering, be careful not to overheat the components.
- Polarity: Pay close attention to the polarity of the wires. Connect the positive wire from the car’s wiring harness to the positive terminal on the speaker, and the negative wire to the negative terminal. Incorrect polarity can result in poor sound quality and even damage to your speakers.
- Electrical Tape: Wrap the connections with electrical tape to insulate them and prevent shorts.
-
Mounting the New Speakers
- Secure the Speaker: Carefully mount the new speaker into the mounting bracket or directly into the door frame. Use the screws that came with the new speakers to secure them in place.
- Tighten Screws: Tighten the screws securely, but be careful not to overtighten them, as this could damage the speaker or the mounting surface.
-
Reassembling the Door Panel
- Reconnect Wiring: Reconnect any wiring harnesses that you disconnected from the door panel, such as those for power windows, door locks, and speakers.
- Align Panel: Align the door panel with the door frame and gently push it back into place. Make sure all the clips are properly engaged.
- Install Screws: Reinstall any screws or fasteners that you removed earlier.
-
Testing and Final Checks
- Reconnect Battery: Reconnect the negative terminal of your car battery.
- Test Speakers: Turn on your car’s audio system and test the new speakers. Make sure they are producing sound and that the sound quality is good.
- Check Wiring: Double-check all wiring connections to ensure they are secure and properly insulated.
- Listen for Rattles: Listen for any rattles or vibrations coming from the door panels. If you hear any, try to identify the source and correct it.
Tips and Tricks
- Take Pictures: Before you start, take pictures of the wiring and panel configurations. This will help you remember how everything goes back together.
- Label Wires: Label the wires as you disconnect them to avoid confusion.
- Work in a Clean Area: Work in a clean and well-lit area to avoid losing small parts.
- Patience is Key: Don’t rush the process. Take your time and be careful.
- Seek Help: If you’re unsure about any step, don’t hesitate to seek help from a friend, a professional installer, or an online forum.
- Dynamat: Apply sound deadening material like Dynamat to the inside of the door panels to reduce vibrations and improve sound quality.
- Upgrade Amplifier: If you want to get the most out of your new speakers, consider upgrading your car’s amplifier.
Troubleshooting
- No Sound: Check the wiring connections and make sure the speakers are properly connected to the amplifier.
- Poor Sound Quality: Check the polarity of the wires and make sure the speakers are properly mounted.
- Rattles or Vibrations: Check the door panels and make sure they are securely attached.
Conclusion
Installing car speakers yourself is a rewarding project that can significantly improve your driving experience. By following these steps and taking your time, you can achieve professional-quality results without breaking the bank. Remember to prioritize safety, double-check your work, and enjoy the enhanced sound quality in your vehicle!
