How to Replace Headlight Bulbs Safely: A Comprehensive Guide
Your headlights are crucial for safe driving, especially at night or in adverse weather conditions. A burnt-out headlight bulb significantly reduces visibility, increasing the risk of accidents. Knowing how to replace your headlight bulbs safely is an essential skill for any vehicle owner. This comprehensive guide will walk you through the process step-by-step, ensuring you can perform this maintenance task effectively and safely.
Why Replacing Headlight Bulbs Yourself is a Good Idea
While you can always take your car to a mechanic to have your headlight bulbs replaced, there are several compelling reasons to consider doing it yourself:
- Cost Savings: Mechanics charge for both the bulb and their labor. Replacing the bulb yourself eliminates the labor cost, saving you money.
- Convenience: You can replace the bulb at your convenience, without needing to schedule an appointment or wait at a repair shop.
- Learning a New Skill: Performing basic maintenance on your vehicle empowers you and helps you understand your car better.
- Immediate Action: When a bulb blows, you can replace it immediately, ensuring you’re not driving with impaired visibility.
Safety First: Essential Precautions
Before you even think about touching your car, safety should be your top priority. Here are crucial precautions to take:
- Read Your Owner’s Manual: Your owner’s manual contains specific information about your vehicle’s headlight system, including the correct bulb type, location of the headlight assembly, and any specific instructions.
- Turn Off the Engine and Lights: Always turn off the engine and headlights before starting any work. This prevents electrical shock and potential damage to the electrical system.
- Allow the Bulbs to Cool Down: Headlight bulbs get extremely hot when in use. Give them ample time to cool down before handling them to avoid burns. At least 15-20 minutes is recommended.
- Disconnect the Negative Battery Terminal (Optional but Recommended): Disconnecting the negative battery terminal provides an extra layer of safety by cutting off the power supply to the entire vehicle. This minimizes the risk of electrical shock and prevents accidental activation of other electrical components. Use a wrench to loosen the nut on the negative terminal, remove the cable, and tuck it away from the battery.
- Wear Gloves: Wear clean gloves (nitrile or latex) to protect your hands from dirt and grease. More importantly, gloves prevent oil from your skin from getting on the new bulb. Oil residue can cause the bulb to overheat and burn out prematurely.
- Eye Protection: Wear safety glasses or goggles to protect your eyes from debris or broken glass.
- Work in a Well-Lit Area: Choose a well-lit area to work in, whether it’s your garage or a driveway with sufficient lighting. Good visibility is essential for performing the task safely and efficiently.
- Use the Right Tools: Have the necessary tools on hand before you start, including the correct replacement bulbs, gloves, safety glasses, a screwdriver (if needed), and potentially a socket wrench.
- Don’t Touch the Glass of the New Bulb: As mentioned, the oils on your skin can cause the bulb to burn out prematurely. If you accidentally touch the glass, clean it with rubbing alcohol and a clean, lint-free cloth before installation.
Tools You’ll Need
- New Headlight Bulbs: Make sure you have the correct bulb type for your vehicle. Consult your owner’s manual or an online bulb compatibility guide. It’s generally recommended to replace both bulbs at the same time, even if only one has burned out. This ensures consistent brightness and color.
- Gloves (Nitrile or Latex): To protect your hands and prevent oil contamination.
- Safety Glasses or Goggles: To protect your eyes.
- Screwdriver (Possibly): Some headlight assemblies are held in place with screws.
- Socket Wrench (Possibly): For removing bolts that secure the headlight assembly.
- Pliers (Possibly): For removing clips or connectors.
- Rubbing Alcohol and Lint-Free Cloth (Optional): For cleaning the new bulb if accidentally touched.
- Owner’s Manual: For specific instructions related to your vehicle.
Step-by-Step Guide to Replacing Headlight Bulbs
-
Prepare Your Vehicle: Park your car on a level surface, turn off the engine and headlights, and engage the parking brake. Disconnect the negative battery terminal (optional but recommended).
-
Locate the Headlight Assembly: Refer to your owner’s manual to identify the location of the headlight assembly. On some vehicles, you can access the bulbs from behind the headlight housing in the engine compartment. On others, you may need to remove the entire headlight assembly.
-
Remove the Headlight Assembly (If Necessary): If you need to remove the assembly, locate the screws or bolts that secure it. Use a screwdriver or socket wrench to remove them. Carefully detach any electrical connectors attached to the assembly. Remember the orientation of the assembly to make reinstallation easier.
-
Access the Bulb: Once you have access to the back of the headlight housing, you’ll typically find a plastic or rubber cover protecting the bulb. Remove this cover by twisting it counterclockwise or unclipping it.
-
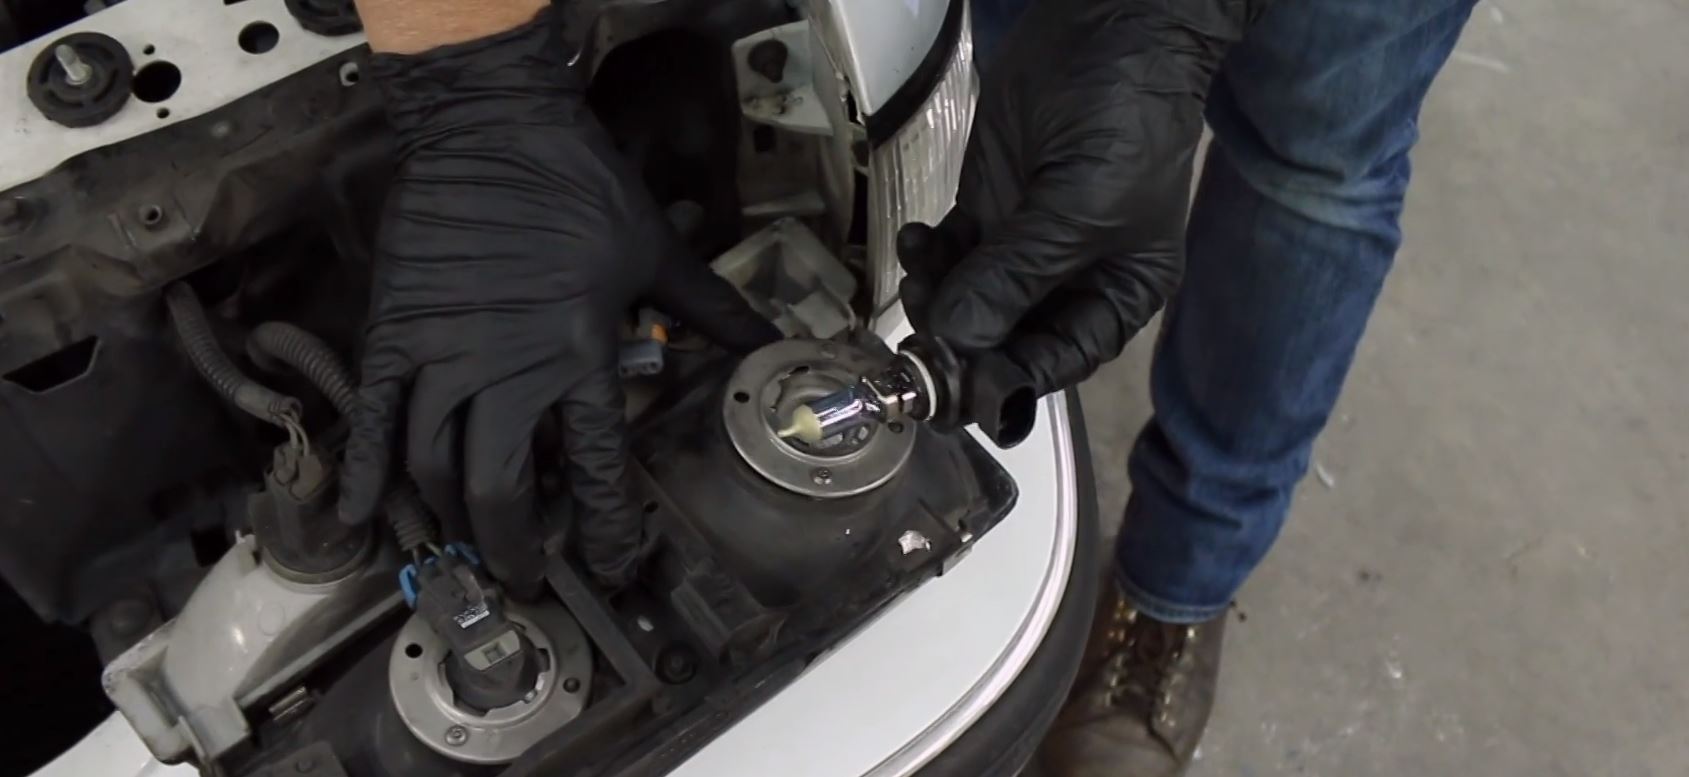
Remove the Old Bulb: Depending on the vehicle, the bulb may be held in place by a wire clip, a rotating collar, or a bayonet-style connector.
- Wire Clip: If there’s a wire clip, carefully unhook it from the bulb. Be gentle to avoid bending or breaking the clip.
- Rotating Collar: If there’s a rotating collar, twist it counterclockwise to release the bulb.
- Bayonet-Style Connector: Push the bulb in slightly and twist it counterclockwise to release it from the socket.
Once the bulb is released, gently pull it straight out of the socket.
-
Install the New Bulb: Wearing gloves, carefully insert the new bulb into the socket. Make sure the bulb is properly aligned with the socket’s notches or tabs.
- Wire Clip: Reattach the wire clip, ensuring it securely holds the bulb in place.
- Rotating Collar: Twist the rotating collar clockwise to lock the bulb in place.
- Bayonet-Style Connector: Push the bulb in slightly and twist it clockwise to lock it into the socket.
-
Replace the Dust Cover: Reattach the plastic or rubber dust cover to the back of the headlight housing. Ensure it’s properly sealed to prevent moisture and debris from entering.
-
Reinstall the Headlight Assembly (If Removed): If you removed the headlight assembly, carefully reinstall it, aligning it with the mounting points. Reattach the screws or bolts and tighten them securely. Reconnect any electrical connectors.
-
Reconnect the Battery (If Disconnected): Reconnect the negative battery terminal, tightening the nut securely.
-
Test the New Bulb: Turn on the headlights to ensure the new bulb is working correctly. Check both low beams and high beams.
-
Repeat for the Other Side: Repeat the process for the other headlight bulb, even if it hasn’t burned out yet. Replacing both bulbs at the same time ensures consistent brightness and color.
Troubleshooting
-
Bulb Doesn’t Light Up:
- Check the Connection: Ensure the bulb is properly seated in the socket and the electrical connector is securely attached.
- Check the Fuse: Check the headlight fuse in your vehicle’s fuse box. A blown fuse can prevent the bulb from lighting up. Replace the fuse with a new one of the same amperage.
- Check the Bulb: Make sure you have the correct bulb for your vehicle and that the bulb itself is not defective.
-
Headlight Assembly Won’t Come Out:
- Double-Check Fasteners: Ensure you’ve removed all the screws or bolts holding the assembly in place.
- Consult Your Owner’s Manual: Your owner’s manual may have specific instructions for removing the assembly.
- Seek Professional Help: If you’re unable to remove the assembly, consult a mechanic.
Disposing of Old Bulbs
Headlight bulbs contain small amounts of mercury and other hazardous materials. Do not throw them in the regular trash. Instead, take them to a recycling center or an auto parts store that accepts used bulbs for recycling.
Conclusion
Replacing your headlight bulbs safely is a straightforward task that can save you money and improve your driving safety. By following these steps and taking the necessary precautions, you can confidently perform this maintenance task yourself. Remember to always prioritize safety and consult your owner’s manual for specific instructions related to your vehicle. Regular maintenance of your headlights ensures optimal visibility and a safer driving experience for you and other drivers on the road.
